How to Start Bird and Wildlife Photography: Gear and Settings
Learn how to start bird and wildlife photography with beginner-friendly gear, camera settings, autofocus tips, shooting techniques and ethical wildlife practices.

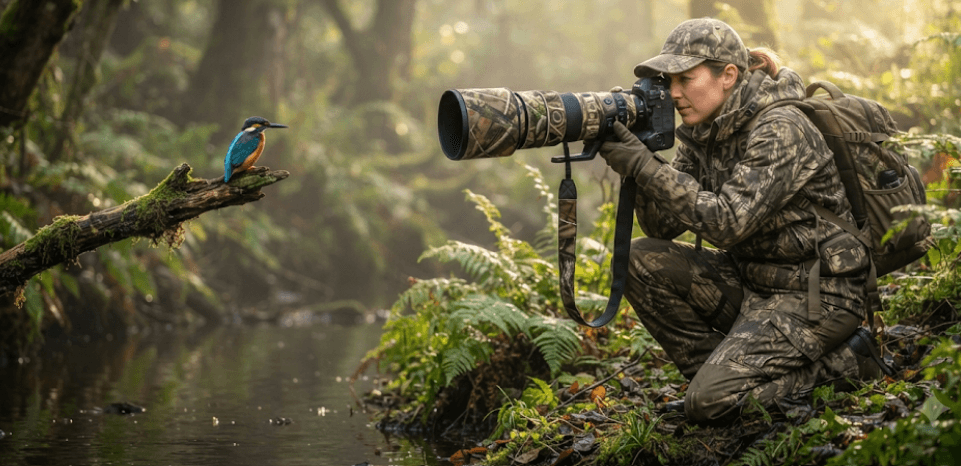
TL;DR Bird and wildlife photography is less about owning the most expensive camera and more about choosing enough reach, learning a few essential settings and understanding animal behaviour. A telephoto lens around 300–400mm or longer is a practical starting point, especially for birds that are small or easily disturbed. Start with a fast shutter speed, continuous autofocus and burst shooting, then adjust aperture and ISO according to the light and movement. For many beginners, around 1/1000 second is a useful starting point for active subjects, while birds in flight often need 1/2000 second or faster. Most importantly, practise close to home, be patient and photograph wildlife without disturbing it.
Start With The Right Camera And Lens
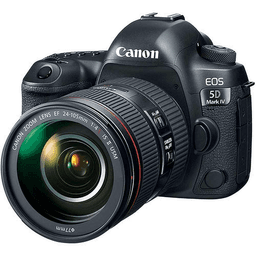
You do not need a professional camera to begin bird and wildlife photography. A modern mirrorless camera is a strong choice because many models offer fast continuous autofocus, subject detection, and useful burst speeds. However, a capable DSLR can also produce excellent wildlife photographs, so upgrading simply because a newer camera exists is not necessary. For beginners, autofocus performance, handling, battery life and lens compatibility are generally more important than chasing the highest megapixel count.
The lens is often more important than the camera body for this type of photography. Birds are usually small, distant, and easily disturbed, so a telephoto lens gives you the reach needed to fill more of the frame while maintaining a respectful distance. Around 300–400mm is a practical starting point, while 400–600mm can be especially useful for smaller birds. A telephoto zoom can be easier for beginners because it lets you adjust the framing when an animal moves closer or farther away.
Your choice will also depend on the type of wildlife you want to photograph. A 100–400mm lens can be versatile for parks, gardens and larger animals, while a 150–600mm or similar long-range zoom can provide additional reach for distant birds. Crop-sensor cameras can also provide a narrower field of view with the same lens compared with a full-frame camera, but it is better to think in terms of actual focal length and field of view rather than assuming a crop sensor physically increases the lens's focal length.
| Gear | Beginner Recommendation | Why It Helps |
|---|---|---|
| Camera | Mirrorless or capable DSLR | Fast AF and good handling |
| Lens | 300–400mm or longer | Provides useful subject reach |
| Memory Card | Fast, reliable card | Handles continuous bursts |
| Extra Battery | Highly recommended | Useful during long outings |
| Support | Monopod or beanbag when needed | Reduces fatigue with long lenses |
| Camera Bag | Weather-resistant preferred | Protects equipment outdoors |
Learn The Three Most Important Settings
If camera menus feel overwhelming, start with three controls: shutter speed, aperture and ISO. Together, they determine exposure, while shutter speed also has a major effect on whether a moving bird or animal appears sharp. Wildlife photography often involves movement, so shutter speed usually deserves priority over keeping ISO extremely low. A noisy photograph can sometimes be improved during editing, but severe motion blur cannot be realistically repaired.
For a perched bird, around 1/500 to 1/1000 second can be a useful starting range, depending on the bird's movement and your lens. For active birds, 1/1000 second or faster is safer. Birds taking off or flying generally require around 1/2000 second or faster, with very fast or small birds sometimes benefiting from 1/2500 second or beyond. These are starting points, not fixed rules. A slowly gliding large bird and a rapidly flapping small bird do not require identical settings.
Aperture controls the amount of light entering the lens and influences depth of field. Many telephoto zooms have maximum apertures around f/5.6 to f/6.3 at their longest focal lengths, while faster lenses may open wider. Starting near the lens's widest aperture can help maintain shutter speed and separate the subject from a distracting background. ISO then becomes the adjustment that helps you maintain the required exposure when the available light is limited.
| Shooting Situation | Starting Shutter Speed | Aperture Starting Point | ISO |
|---|---|---|---|
| Perched bird | 1/500–1/1000s | Wide open to f/8 | Auto or adjust as needed |
| Moving bird | Around 1/1000s or faster | Wide open to f/8 | Auto or adjust as needed |
| Large bird in flight | Around 1/2000s | Wide open to f/8 | Adjust for exposure |
| Fast/small bird in flight | 1/2500s+ | Wide open to f/8 | Adjust for exposure |
| Mammal moving | Around 1/1000s | Wide open to f/8 | Adjust for exposure |
Use Autofocus And Burst Shooting
Autofocus is one of the biggest reasons modern cameras are useful for wildlife photography. Start with continuous autofocus, commonly labelled AF-C on many cameras. This allows the camera to continuously adjust focus while the subject moves. If your camera has animal or bird detection, test it because it can help identify and track the subject. However, subject detection is not equally effective in every situation, especially when birds are surrounded by branches, leaves or other objects.
Your focus area should change according to the scene. A smaller focus area can give you more control when photographing a perched bird through branches because a large autofocus area may lock onto the foreground instead. For birds in open flight, a wider tracking area can make it easier for the camera to stay with the subject as it moves across the frame. There is no single autofocus-area setting that works perfectly for every wildlife situation.
Continuous or high-speed burst shooting can also improve your chances of capturing the right moment. You might photograph a bird several times as it takes off, lands or shakes water from its feathers, then select the sharpest frame later. This does not mean holding the shutter continuously for every subject. Short, controlled bursts help preserve storage space, battery life and time spent reviewing hundreds of almost-identical images.
Choose RAW And Use Auto ISO Wisely
RAW files retain more image information than JPEG files and offer greater editing flexibility. This can be especially useful in wildlife photography because birds may have very bright feathers and dark shadows in the same frame. RAW gives you more room to adjust exposure, highlights, shadows, and white balance later. It does, however, create larger files and normally requires editing software for the best results.
Auto ISO can be particularly useful when the light changes quickly. Imagine photographing a bird that moves from an open sunny branch into shade. If you manually change ISO every time the light changes, you may miss the moment. Using Auto ISO allows the camera to adjust sensitivity while you protect the shutter speed and aperture that matter most for the shot. Many cameras also allow you to set an ISO limit, although the appropriate maximum depends on your camera and your personal tolerance for noise.
A practical beginner approach is to prioritise shutter speed first, aperture second and ISO third. If the photograph is too dark, increasing ISO is generally preferable to lowering the shutter speed when your subject is moving. For a stationary animal, however, you may have more freedom to use a slower shutter speed if your camera and lens are stable. The goal is not the lowest possible ISO. The goal is a properly exposed, sharp photograph.
Get Better Results With Light And Composition
Good wildlife photographs are not created by camera settings alone. Light can completely change the appearance of feathers, fur, eyes and textures. Early morning and late afternoon often provide softer light and can produce attractive highlights and shadows. Overcast conditions can also be useful because clouds reduce harsh contrast and make exposure more manageable.
Pay attention to where the light is coming from before you start shooting. When the light is behind you, the subject can be illuminated more evenly and you may get a visible catchlight in the eye. Backlighting can also produce beautiful images, but it requires more careful exposure because bright backgrounds can affect the camera's metering. Rather than following one lighting rule, look at the subject and decide whether the light is helping the photograph.
Composition is equally important. Avoid automatically placing every animal in the exact centre of the frame. Leave some space in front of a bird when it is looking or flying in a particular direction. Try photographing from a lower angle when safe and practical, as getting closer to the animal's eye level can create a stronger sense of connection. Also look at the background before pressing the shutter. A few steps sideways can sometimes turn a cluttered background into a clean, distracting-free area.
Practise Fieldcraft And Wildlife Ethics
Wildlife photography begins with observation. Learn where animals are likely to feed, rest, drink or move before worrying about getting the perfect photograph. Spend time watching behaviour and anticipating what may happen next. A bird that repeatedly looks toward the ground may be preparing to feed, while an animal displaying repeated signs of alertness may have noticed your presence. Understanding behaviour can help you react faster and avoid unnecessary disturbance.
Distance and patience matter. Use your lens to reach the subject instead of repeatedly walking closer. Avoid chasing animals, blocking their movement or surrounding them with photographers. Never sacrifice an animal's welfare for a photograph. Nesting birds and animals with young can be particularly sensitive to disturbance, so give them plenty of space and follow local rules and guidance. Ethical wildlife photography should always come before getting a closer frame.
You also do not need an expensive wildlife reserve trip to start practising. A garden, local park, wetland or other permitted natural area can provide plenty of opportunities. Starting close to home lets you learn your camera without the pressure of a once-in-a-lifetime wildlife encounter. As your skills improve, you can gradually explore dedicated birding locations and wildlife destinations while respecting their access rules and conservation guidelines.
Build A Simple Beginner Workflow
Before heading out, charge your batteries, clear enough memory-card space and clean the front element of your lens. Set your camera to RAW, continuous autofocus and continuous shooting. Select a starting shutter speed based on your subject and choose an aperture that gives you enough light and depth of field. If the light is changing, Auto ISO can make exposure easier to manage.
Once you find a subject, avoid immediately firing dozens of photographs. Watch it first. Check the background, direction of light and possible movement. If it is perched, begin around 1/500–1/1000 second and adjust according to movement. If it starts moving rapidly or takes flight, increase the shutter speed. For birds in flight, around 1/2000 second or faster is a sensible starting point, with faster speeds useful for smaller, rapidly flapping birds.
After each outing, review your photographs and look for patterns. Were your images blurry because the shutter speed was too slow? Did autofocus lock onto a branch? Were highlights overexposed? Was the background distracting? This review process will teach you much faster than simply buying new equipment. Keep notes about settings that worked in different lighting conditions, and gradually build your own wildlife photography cheat sheet.
Common Beginner Mistakes To Avoid
One common mistake is buying the camera body first and treating the lens as an afterthought. In wildlife photography, reach is critical because many subjects cannot or should not be approached closely. Another mistake is using an unnecessarily slow shutter speed because the ISO number looks uncomfortable. If the animal is moving, protecting shutter speed is usually more important than keeping ISO extremely low.
Another problem is relying completely on automatic modes without understanding what the camera is doing. Automatic settings can be useful while learning, but knowing how shutter speed, aperture and ISO interact gives you much more control. Similarly, do not assume that bird-eye autofocus will always find the eye. Branches, poor light, small subjects and busy backgrounds can still confuse autofocus systems.
Finally, beginners sometimes focus entirely on the animal and forget the photograph as a whole. A technically sharp bird can still make a weak image if the background is messy, the light is harsh or the subject is cramped against the frame. Before pressing the shutter, quickly check the eye, background, light and composition. That one-second pause can make a noticeable difference.
Final Recommendation
The best way to start bird and wildlife photography is to begin with the equipment you can realistically handle, not the equipment you see professionals using. A capable camera paired with a 300–400mm or longer telephoto lens is a practical starting point, while a 400–600mm lens can provide additional reach for smaller or more distant birds.
For your first outings, keep the settings simple: continuous autofocus, continuous shooting, RAW, a shutter speed around 1/1000 second for active subjects and 1/2000 second or faster for many birds in flight. Adjust aperture and ISO according to the available light rather than treating any number as universal.
Most importantly, spend time watching wildlife. Learn its behaviour, work with natural light, maintain a respectful distance and practise regularly. Better wildlife photography comes from combining good reach, appropriate settings, patience and fieldcraft, not simply from owning the most expensive camera.
Frequently Asked Questions
Q. What camera is best for beginner bird photography?
A modern mirrorless camera with reliable continuous autofocus and good handling is an excellent choice, but a capable DSLR can also produce high-quality bird photographs.
Q. What lens should a beginner use for bird photography?
A telephoto lens around 300–400mm or longer is a practical starting point. Longer focal lengths can be useful for small or distant birds.
Q. What shutter speed should I use for bird photography?
Around 1/500–1/1000 second can work for perched birds, while active birds often benefit from around 1/1000 second or faster. Birds in flight commonly require 1/2000 second or faster.
Q. What ISO should I use for wildlife photography?
There is no universal ISO. Use the lowest ISO that still allows you to maintain the shutter speed and aperture needed for the scene. Auto ISO can be useful when lighting changes quickly.
Q. Should I use autofocus for bird photography?
Yes. Continuous autofocus is generally a good starting point because birds move unpredictably. Bird or animal detection can also help when your camera supports it.
Q. Is a 600mm lens necessary for bird photography?
No. A 600mm lens provides more reach, but it is not essential for beginners. A 300–400mm lens can be a useful starting point, particularly when photographing larger birds or subjects that are relatively close.
Q. Should I shoot birds in RAW or JPEG?
RAW is generally preferable if you plan to edit your photographs because it provides greater flexibility with exposure, highlights, shadows and white balance.
Q. What time of day is best for bird photography?
Early morning and late afternoon often provide softer light and can offer good wildlife activity. However, overcast conditions can also produce attractive, even lighting.
Q. How do I photograph birds in flight?
Use continuous autofocus, a wider tracking area when appropriate, continuous burst shooting and a fast shutter speed. Around 1/2000 second or faster is a useful starting point, but the ideal speed depends on the bird and its movement.
Q. How can I photograph wildlife without disturbing it?
Maintain a respectful distance, avoid chasing or cornering animals, do not interfere with nests or young, and follow local wildlife regulations and site-specific guidelines.
Ready to upgrade your tech?
Browse our collection of quality refurbished products at unbeatable prices.