How to Print Photos: Sizes, DPI and Paper Types Explained
Learn how to print sharp photos at home with the right sizes, resolution, PPI, paper type and printer settings. Compare glossy, matte and luster paper.

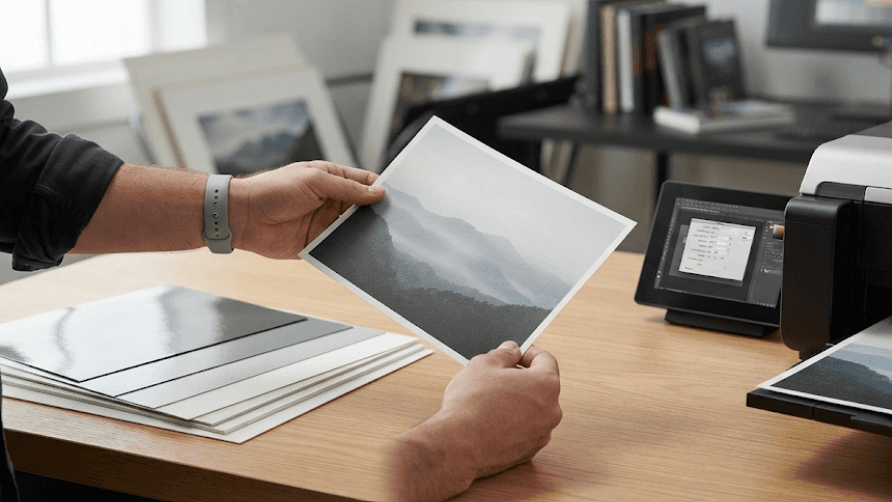
TL;DR: Printing a photo that looks sharp on paper starts with three things: the right image resolution, the correct print size, and suitable photo paper. For most everyday photo prints, 300 PPI at the final print size is a reliable target. A 4 × 6-inch photo, for example, ideally needs about 1200 × 1800 pixels. Glossy paper gives vibrant colours and strong contrast, matte reduces reflections, and luster or satin offers a balance between the two. Before printing, crop the image to the correct aspect ratio, select the matching paper type in your printer settings, choose high-quality printing, and make a test print if the photo is important.
Understanding Photo Print Resolution
When preparing a photo for printing, resolution is one of the first things to check. A digital image is made up of pixels, while a printer creates the physical print using tiny dots of ink or toner. PPI, or pixels per inch, describes the density of pixels in the digital image at its intended print size. DPI, or dots per inch, describes the printer's output. The two terms are related, but they are not interchangeable.
For most standard photographic prints viewed from a normal distance, 300 PPI at the final print size is a useful quality target. It provides enough image detail for sharp-looking prints in common sizes. However, 300 PPI is not an absolute requirement for every print. Larger photographs are often viewed from farther away, so a lower effective PPI can still produce a good-looking result. What matters most is having enough actual pixels for the size you want to print.
The easiest calculation is simple: multiply the desired print dimensions in inches by 300 to estimate the pixel dimensions you need. For example, a 4 × 6-inch print at 300 PPI requires approximately 1200 × 1800 pixels. An 8 × 10-inch print requires approximately 2400 × 3000 pixels. If the original image has significantly fewer pixels, enlarging it may make details look soft or pixelated.
Common Photo Print Sizes And Pixel Requirements
Photo printing comes in several standard sizes, and choosing the right one depends on where you plan to use the picture. 4 × 6 inches is one of the most common choices for everyday snapshots and albums. 5 × 7 inches works well for small frames and greeting cards, while 8 × 10 inches is popular for portraits and framed photographs. A4 is also convenient for home printing, especially when creating collages or larger displays.
The important point is that the physical dimensions and aspect ratio of the print can affect the final image. A photo taken with a smartphone or camera may not have the same aspect ratio as the paper. If you simply select a print size without cropping, the printer or printing service may crop part of the image to make it fit. This can unintentionally cut off faces, text or other important details.
Use the table below as a practical starting point when preparing files for common print sizes. These figures are based on approximately 300 PPI and represent the pixel dimensions needed for that target size. Actual printer and lab requirements can vary, so check the provider's specifications when they are available.
| Print Size | Approx. Pixel Dimensions at 300 PPI | Common Use |
|---|---|---|
| 4 × 6 in | 1200 × 1800 px | Albums, snapshots |
| 5 × 7 in | 1500 × 2100 px | Small frames, cards |
| 8 × 10 in | 2400 × 3000 px | Portraits, framed photos |
| 11 × 14 in | 3300 × 4200 px | Wall displays |
| A4 | 2480 × 3508 px | Collages, larger home prints |
| A3 | 3508 × 4961 px | Larger wall prints |
How To Choose The Right Photo Paper
The paper you choose can change how your photograph looks even when you use exactly the same image and printer. Photo papers are available with different surface finishes, coatings and weights. These characteristics influence how light reflects from the print and how colours, contrast and fine details appear.
Glossy photo paper has a shiny surface and is known for producing vibrant colours and strong contrast. It can work particularly well for colourful landscapes, travel photographs, family snapshots and images where you want colours to look punchy. The downside is that glossy surfaces can produce reflections under strong lighting and are more likely to show fingerprints when handled.
Matte photo paper has little to no visible shine, making it useful when reflections are a concern. It can be a good choice for framed photographs, artwork, portraits and black-and-white images, especially when the print will be viewed under bright lighting. Colours may appear less punchy than on glossy paper, but the softer appearance can be desirable for certain photographs.
Luster or satin paper sits between glossy and matte. It usually has some sheen and a subtle surface texture, giving photographs strong colour and detail while reducing some of the glare associated with glossy paper. Because it offers a balance between appearance and handling, luster or satin is a versatile option for portraits, albums, framed photographs and general-purpose photo printing.
| Paper Type | Appearance | Best For | Main Consideration |
|---|---|---|---|
| Glossy | Highly reflective and shiny | Vibrant photos, albums, colourful images | Can show glare and fingerprints |
| Matte | Low or no shine | Framed photos, artwork, bright rooms | Softer colour and contrast |
| Luster/Satin | Moderate sheen | Portraits, albums, general use | Finish varies between brands |
| Fine Art | Textured or premium surface | Art photography, exhibition prints | Usually more expensive and printer-dependent |
Prepare Your Photo Before Printing
Before pressing Print, check the image itself. Start with the highest-quality original file available rather than a compressed image downloaded from a messaging app or social media platform. Compression can reduce image detail, and a file that looks perfectly acceptable on a phone screen may not contain enough information for a large physical print.
Next, crop the photograph according to the intended print size. This is especially important when the image and paper have different aspect ratios. For example, a 4 × 6-inch print has a 3:2 aspect ratio, while an 8 × 10-inch print has a 4:5 ratio. A photograph originally captured in another ratio may need to be cropped before printing. Always check the crop preview carefully so that important subjects remain inside the frame.
It is also worth checking brightness, contrast and colour before making the final print. A screen is backlit, while a printed photograph is viewed using reflected light, so the two will never look exactly identical. If colour accuracy is particularly important, a calibrated monitor and an appropriate printer or paper colour profile can improve consistency. For an important photograph, printing a small test area first can help prevent wasted paper and ink.
Set Up Your Printer Correctly
Loading the right paper is only part of the process. Your printer settings should match the paper you are using. In the print dialogue, select the correct paper size and choose the corresponding media type, such as Glossy Photo Paper, Matte Photo Paper or another option recommended by the paper manufacturer. This setting can affect how the printer controls ink application, so selecting plain paper when glossy photo paper is loaded can lead to poor results.
For photo printing, choose a higher-quality setting such as Best, High or Photo, depending on the printer. If you want the photograph to reach the edges of the paper, enable borderless printing if your printer and selected paper size support it. Keep in mind that borderless printing can slightly enlarge or crop the image, so check the preview before printing.
Also make sure the printable side of the photo paper is facing the correct direction. The exact loading method varies by printer, so the printer manual or tray markings should take priority. After printing an inkjet photo, allow it to dry before stacking or placing it in an album. Some photo papers can take longer to fully settle, particularly when a lot of ink has been applied.
PPI, DPI And Image Quality: What Really Matters?
The terms PPI and DPI are often mixed together in photo-printing guides, but understanding the difference can prevent confusion. PPI refers to pixels per inch in the image, while DPI refers to the dots produced by a printer. When you are preparing a digital photograph for a specific physical size, the number of pixels available in the image is especially important.
For example, suppose you have a photograph that is 4000 × 3000 pixels. At 300 PPI, dividing each dimension by 300 gives approximately 13.3 × 10 inches. That does not mean the image can never be printed larger. You can print it at a larger size, particularly when the photograph will be viewed from farther away, but the effective pixel density will be lower.
This is why simply changing the resolution number in an editing program does not magically create additional photographic detail. If an image has a low pixel count, changing its PPI metadata without adding real image information does not suddenly make it a high-resolution photograph. For large prints, the original pixel dimensions, viewing distance, image quality and printing process all matter.
How To Print Photos At Home
Printing photos at home can be straightforward once the image, paper and printer settings are matched. Start by selecting the original high-resolution photograph and decide on the final print size. Crop it to the appropriate aspect ratio, check the composition and make any necessary adjustments to brightness, contrast and colour.
Load compatible photo paper according to the printer's instructions. In the print settings, select the correct paper size and media type, then choose a high-quality photo setting. If you want an edge-to-edge result, enable borderless printing where supported. If your printer offers a choice between application-managed and printer-managed colour, avoid accidentally enabling both systems at the same time, as conflicting colour management can affect the output.
For an important photograph, do not immediately use your most expensive paper. A small test print or test crop can reveal problems with brightness, cropping, colours or paper settings before you use a full sheet. Once the result looks right, make the final print and allow it to dry properly before handling or storing it.
Troubleshooting Common Photo Printing Problems
Even a high-resolution photograph can look disappointing if the printer settings or paper are wrong. A blurry print can indicate that the original image does not have enough pixels for the selected print size. If colours look washed out, check whether the correct paper type and print-quality settings are selected. If the print looks unexpectedly dark, the issue may involve the image, monitor brightness or colour-management workflow rather than the printer alone.
White borders are another common issue. If you expected an edge-to-edge photograph but see white strips around the image, check whether borderless printing is enabled and whether your printer supports borderless output for that particular paper size. Remember that borderless printing can require slight image enlargement, which may crop the edges.
Paper compatibility also matters. Photo paper designed for an inkjet printer should not automatically be assumed to work in a laser printer. Different printing technologies use different processes, coatings and heat conditions. Always check that the paper is intended for your printer type. If streaks or bands appear across the photograph, printer maintenance such as printhead cleaning may also be necessary on compatible inkjet models.
| Problem | Possible Cause | What To Check |
|---|---|---|
| Photo looks blurry | Low-resolution source | Pixel dimensions and print size |
| Colours look dull | Wrong paper or print setting | Media type and quality setting |
| Print is too dark | Image or colour-management issue | Monitor and image brightness |
| White edges appear | Borderless printing disabled | Borderless setting and paper support |
| Image is cropped | Incorrect aspect ratio | Crop and print preview |
| Streaks appear | Printhead or ink issue | Printer maintenance settings |
Final Recommendation
For most people printing photographs at home, the safest starting point is simple: use the highest-quality original image available, aim for around 300 PPI at the final print size, choose the correct paper finish, and match the printer settings to that paper. For a standard 4 × 6-inch photograph, around 1200 × 1800 pixels is a useful 300 PPI target. For larger prints, check the pixel dimensions before increasing the physical size.
If you want maximum colour impact, start with glossy paper. If you want a low-reflection, understated finish, choose matte. If you are unsure and want a versatile option for portraits, albums and framed photographs, luster or satin is a strong middle-ground choice.
Most importantly, do not assume that a higher DPI setting can fix a poor source image. Good photo printing is a combination of sufficient image pixels, suitable print dimensions, correct cropping, compatible paper and appropriate printer settings. Get those basics right, and even a home printer can produce photographs that look considerably better than a quick default print.
Frequently Asked Questions
Q. What DPI should I use to print photos?
For most high-quality photo prints, aim for about 300 PPI at the final print size. DPI technically refers to the printer's physical ink-dot output.
Q. Is 300 DPI good for photo printing?
Yes. Around 300 PPI is a reliable target for sharp photo prints viewed from a normal distance, although the ideal resolution can vary with print size and viewing distance.
Q. What resolution do I need for a 4 × 6 photo?
For approximately 300 PPI, a 4 × 6-inch print needs around 1200 × 1800 pixels.
Q. Which is better for photos, glossy or matte paper?
Neither is universally better. Glossy produces vibrant colours and strong contrast, while matte reduces reflections and gives a softer appearance.
Q. What is the difference between PPI and DPI?
PPI describes the number of image pixels per inch at the intended print size. DPI describes the physical dots produced by a printer.
Q. Why does my printed photo look blurry?
The source image may not have enough pixels for the selected print size. Increasing the physical print size without sufficient image detail can make the result look soft or pixelated.
Q. Why are the colours different on my screen and paper?
Screens emit light, while prints reflect light. Differences in colour spaces, monitor settings, printer settings and paper can therefore cause visible differences.
Q. Should I use glossy paper for portraits?
Glossy can work very well for colourful portraits, but luster or satin is also a popular option because it offers strong colour with less glare. Matte can be preferable when reflections are a concern.
Q. Can I print a low-resolution photo in a large size?
You can, but the result may look softer or pixelated. The acceptable resolution depends partly on the viewing distance and the quality of the original image.
Q. Do I need special photo paper to print photographs at home?
For the best photographic results, use paper designed for your printer technology and select the matching media type in the printer settings. Regular office paper is not designed to reproduce photographs in the same way as photo paper.
Ready to upgrade your tech?
Browse our collection of quality refurbished products at unbeatable prices.