Depth of Field Explained: How to Get a Blurry Background
Learn how depth of field works and how to create a naturally blurry background. Discover the role of aperture, focal length, distance, focus, bokeh, and smartphone portrait modes.

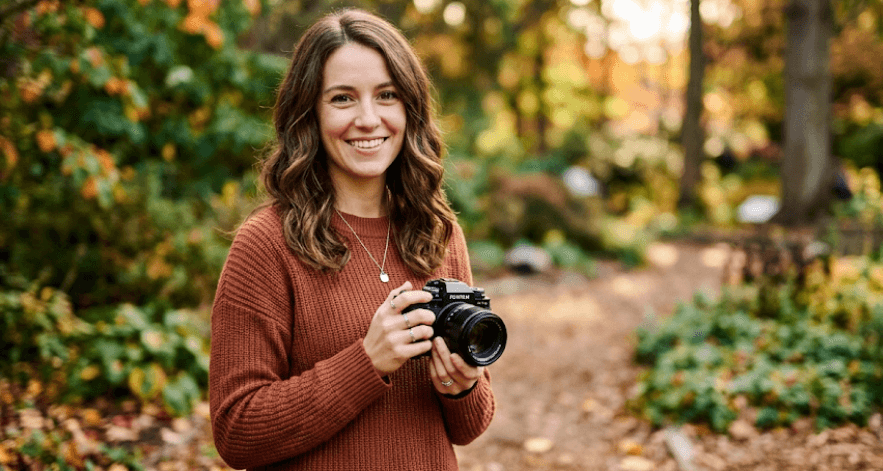
TL;DR: Depth of field (DOF) is the range of a photograph that appears acceptably sharp. A shallow depth of field keeps your subject sharp while making the foreground or background look blurry. To create this effect, use a wider aperture such as f/1.8 or f/2.8, get closer to your subject, increase the distance between your subject and the background, and use a longer focal length when it suits your composition. The result can be a cleaner portrait, a more focused product shot, or simply a photo with fewer distracting elements.
What Is Depth Of Field?
Depth of field is the range of distance in a photograph that appears acceptably sharp around the point you have focused on. It is not simply a measure of how much of the frame is sharp from left to right. Instead, it describes how much depth in the scene, from closer objects to farther objects, appears to be in focus. Everything outside that range gradually becomes less sharp.
A shallow depth of field means a smaller portion of the scene appears sharp, while areas in front of or behind the focus point become increasingly blurred. This is the look commonly associated with portraits where the person's eyes are sharp but the background melts away. A deep depth of field, on the other hand, keeps a larger range of the scene acceptably sharp, which is why it is often useful for landscapes, architecture, and scenes where environmental details matter.
Depth of field is a creative tool, not just a camera setting. It can help decide what the viewer notices first and reduce distracting details around your subject. Once you understand what controls it, you do not need to rely on a single “blurry background” setting. You can combine aperture, lens choice, shooting distance, and subject placement to create the look you want.
How Aperture Controls Background Blur
Aperture is one of the most important controls for changing depth of field. It refers to the opening inside the lens that allows light to reach the camera sensor and is expressed using f-numbers such as f/1.8, f/2.8, f/5.6, and f/11. The confusing part for beginners is that a smaller f-number means a larger physical aperture opening.
For example, an aperture of f/1.8 is wider than f/8. A wider aperture produces a shallower depth of field, so less of the scene appears sharp. This can make the background look considerably softer. Conversely, stopping the lens down to f/8 or f/11 increases depth of field, bringing more of the scene into acceptable focus.
If your main goal is background blur, start with the widest practical aperture your lens offers. A lens capable of f/1.8 gives you more scope for shallow depth of field than one whose widest aperture is f/5.6. However, maximum aperture is not always the best choice. At very wide apertures, the depth of field can become so thin that part of a face or product may fall outside the desired focus area.
| Aperture | Depth Of Field | Typical Use |
|---|---|---|
| f/1.4–f/2 | Very shallow | Portraits, low-light subjects |
| f/2.8–f/4 | Shallow | Portraits, products, lifestyle |
| f/5.6–f/8 | Moderate | Everyday photography |
| f/11–f/16 | Deep | Landscapes, architecture |
Why Distance Matters More Than You Think
Aperture gets most of the attention when people talk about background blur, but your distance from the subject also matters. Moving closer to your subject generally makes the depth of field shallower. This is particularly noticeable in close-up photography, where even a small change in camera position can alter which parts of the subject remain sharp.
The distance between your subject and the background is equally important for the appearance of blur. If your subject is standing directly against a wall, the wall may remain relatively recognizable even when you use a wide aperture. Move the subject farther away from that wall, and the background can become much more defocused. This is one of the easiest techniques to use when your lens does not have an extremely wide maximum aperture.
Try this simple experiment with a portrait. Place your subject a few feet in front of a wall and take a photo. Then move the subject several feet farther away from the wall while keeping roughly the same framing. With the same camera and aperture, the background should appear more out of focus because it is farther behind the subject. Nikon also recommends increasing the separation between the subject and background when creating a stronger bokeh effect.
How Focal Length Changes The Look
Focal length, measured in millimeters, determines the lens's angle of view and magnification. Shorter focal lengths show more of the scene, while longer focal lengths provide a narrower angle of view and greater magnification. This is why a 24mm lens and an 85mm lens can produce very different-looking portraits even when both are focused on the same person.
Longer focal lengths are commonly used to create a more pronounced background blur, particularly for portraits. A telephoto lens can make it easier to isolate a subject because it narrows the field of view and can make distant background elements appear larger and visually closer. This is why lenses in the portrait-friendly range, such as 85mm or 100mm and beyond, are often associated with strong subject separation.
There is an important catch, though: focal length should not be treated as an isolated blur switch. Your camera-to-subject distance, framing, aperture, and subject-to-background distance all interact. For example, simply switching from a wide lens to a telephoto lens while dramatically changing your shooting distance changes the perspective and depth-of-field relationship. The best approach is to use focal length as part of the overall composition rather than chasing a particular number.
How To Get A Blurry Background
Start by selecting a subject that can be clearly separated from its surroundings. Portraits are an obvious choice, but the same technique works for flowers, food, products, pets, and other objects. Place the subject away from the background whenever possible. A background with lights, foliage, or other small highlights can produce an especially noticeable blur effect.
Next, select Aperture Priority mode if your camera offers it. This allows you to choose the aperture while the camera automatically selects a shutter speed for the exposure. Start with a wide aperture such as f/2.8 or the widest practical setting available on your lens. Then focus carefully on the most important part of the subject. For a portrait, that is usually the eye closest to the camera.
Finally, check the image rather than assuming the settings worked perfectly. Zoom in on the subject to make sure the important details are actually sharp. If too little of the subject is in focus, try a slightly narrower aperture such as f/2.8 or f/4. If the background still looks too defined, increase the distance between the subject and background or change your position and focal length while maintaining the composition you want.
A Simple Setup To Try
For a basic portrait, place your subject several feet away from a background. Use the widest practical aperture, focus on the eye, and keep the background as far behind the subject as your composition allows. If you have a longer lens, try it from an appropriate distance and compare the result with a shorter focal length.
How To Get Better Bokeh
Blur and bokeh are related, but they are not exactly the same thing. Background blur describes the area that has fallen out of focus, while bokeh generally refers to the visual character or quality of that out-of-focus rendering. Two lenses can create a similar amount of background blur while producing different-looking highlights and transitions in the defocused areas.
If you want visible bokeh, look for small bright points in the background, such as distant lights or sunlight passing through leaves. When these highlights fall outside the depth of field, they can appear as soft, rounded shapes. Their appearance depends on factors including the lens design, aperture, focus distance, and the shape of the lens's aperture opening.
Composition also matters. A cluttered background can still look distracting even when it is technically blurred. Look for colors, shapes, and light sources that complement the subject rather than simply trying to make everything behind it disappear. Good bokeh supports the photograph; it should not become the subject of the photograph unless that is your intention.
Depth Of Field On A Smartphone
Smartphones can create background blur, but they achieve it differently depending on the device and shooting mode. A phone may use multiple cameras and computational photography to estimate depth and simulate or enhance background blur. Portrait modes can therefore produce a shallow-depth-of-field look even when the physical optics do not behave like those of a large-camera lens.
The physical size of a smartphone camera and lens system also affects how easily it can produce natural optical background blur. Smartphones generally have much smaller lenses and sensors than interchangeable-lens cameras, so computational processing plays a significant role in portrait-style blur on many devices.
If you are using a phone, switch to Portrait mode when available and keep the subject clearly separated from the background. Avoid extremely complicated edges such as hair against busy foliage if the phone struggles with depth separation. Also remember that simulated blur can sometimes produce visible errors around hair, glasses, fingers, or other fine details, so inspect the final image before sharing it.
| Camera Type | Easiest Way To Create Blur |
|---|---|
| DSLR or mirrorless | Wide aperture + subject separation |
| Compact camera | Use the widest practical aperture and suitable focal length |
| Smartphone | Portrait mode + subject/background separation |
| Telephoto setup | Longer focal length + appropriate framing |
Common Depth Of Field Mistakes
One common mistake is assuming that simply choosing f/1.8 guarantees a perfect blurry background. A wide aperture can create a shallow depth of field, but the final appearance still depends on focus distance, focal length, subject placement, and the background. If the subject is close to a wall, for example, the wall may remain visually prominent even with a wide aperture.
Another mistake is using the widest aperture without checking whether enough of the subject is sharp. In a close portrait, the depth of field can become very thin. You might get one eye sharply focused while the other eye or important facial details become noticeably softer. Sometimes moving slightly farther away or stopping down by one or two stops produces a more balanced result.
Finally, do not confuse shutter speed with direct control over depth of field. Shutter speed controls how long the sensor is exposed to light and can influence how you set the rest of the exposure, but it does not directly determine the depth of field. Aperture, focal length, and shooting distance are the key practical factors to focus on when you want to change depth of field.
Final Recommendation And Decision Framework
If you are just starting, do not try to memorize complicated depth-of-field calculations. Start with one simple formula: wide aperture + close subject + distant background = stronger background separation. Then experiment with focal length and your camera position to see how the composition changes. This approach is much more useful than simply selecting the lowest f-number available.
For portraits, begin around f/2.8 if your lens supports it and adjust depending on how much of the person you want sharp. For a single object or product, a wider aperture can work well when you want the object to stand out, but you may need to stop down slightly if important parts of the product fall outside the focus zone. For landscapes, a smaller aperture such as f/8 or f/11 is often a more sensible starting point when you want more of the scene to appear sharp.
Most importantly, remember that good background blur is not created by aperture alone. Think about the entire scene: where you stand, where your subject stands, what lens you use, how far the background is, and where you place your focus point. Once these elements start working together, depth of field becomes less of a confusing camera setting and more of a creative tool you can deliberately use.
Frequently Asked Questions
Q. What is depth of field in photography?
Depth of field is the range of distance in a photograph that appears acceptably sharp around the focus point.
Q. What aperture gives the most background blur?
A wider aperture, represented by a lower f-number such as f/1.8 or f/2.8, generally produces a shallower depth of field and stronger background blur.
Q. Does a higher f-number increase depth of field?
Yes. Increasing the f-number makes the aperture smaller and generally increases the range of the scene that appears acceptably sharp.
Q. How do I blur the background without buying a new lens?
Move closer to your subject, increase the distance between the subject and background, and use the widest practical aperture available on your existing lens.
Q. Does focal length affect depth of field?
Yes. Focal length is one of the factors that affects depth of field and background rendering. Longer lenses are commonly useful for subject isolation, although focal length should be considered together with shooting distance and framing.
Q. Why is my background not blurry even at f/1.8?
Your subject may be too close to the background, your shooting distance may not be suitable, or the background may contain details that remain visually prominent. Increase subject-background separation and check your composition.
Q. Is bokeh the same as background blur?
No. Background blur describes the defocused area, while bokeh refers more specifically to the appearance and quality of that out-of-focus rendering.
Q. Can I create shallow depth of field with a smartphone?
Yes. Many smartphones offer Portrait modes that use computational photography and, depending on the device, multiple cameras to create or enhance a background-blur effect.
Q. What is the best depth of field for portraits?
There is no single best setting. A wide aperture can create strong separation, but you should choose an aperture that keeps the important parts of the face or subject sufficiently sharp.
Q. Does shutter speed control depth of field?
Not directly. Shutter speed affects exposure and motion rendering. Aperture, focal length, and shooting distance are the main practical controls for changing depth of field.
Ready to upgrade your tech?
Browse our collection of quality refurbished products at unbeatable prices.