Best Sony A6400 Settings for Vlogging and YouTube
Get the best Sony A6400 settings for YouTube and vlogging, from 4K recording and shutter speed to autofocus, ISO, white balance, Picture Profile, and audio.

TL;DR The best Sony A6400 settings for vlogging and YouTube depend on whether you are filming yourself indoors, walking outdoors, or recording cinematic B-roll, but a reliable starting point is 4K 25p at 100 Mbps for detailed footage, a shutter speed of 1/50, AF-C with Face Priority enabled, and a suitable aperture based on your lens and lighting. The A6400 can record 4K internally in XAVC S, and the PAL version commonly used in India supports 4K 25p at up to 100 Mbps and Full HD 100p for slow motion. Its 180-degree tilting LCD makes self-recording easier, while the 3.5 mm microphone input lets you connect an external mic. For straightforward YouTube videos, a standard-looking Picture Profile is usually easier to manage than S-Log, especially if you do not plan to color grade your footage heavily.
Best Sony A6400 Video Settings for YouTube
The Sony A6400 is still a capable YouTube camera because it gives creators a useful combination of 4K recording, fast autofocus, a compact APS-C body, and a screen that can face forward. Sony's specifications confirm that the camera can record 4K at 3840 x 2160, with the PAL version offering 25p recording at both 100 Mbps and 60 Mbps. For most YouTube videos, 4K 25p at 100 Mbps is the strongest starting point when you want detailed footage and have enough storage for larger video files. The camera records this footage using Sony's XAVC S format.
For the shutter speed, the traditional starting point is approximately double your frame rate. That means 1/50 for 25p footage and 1/100 for 50p footage. This gives movement a natural amount of motion blur instead of making it look unusually sharp and stuttery. If you are filming a talking-head video from a tripod, 25p at 1/50 is generally a sensible combination. You can then use the aperture and ISO to control exposure rather than constantly changing the shutter speed during a take.
Your aperture should depend on the lens, lighting, and the amount of background separation you want. A wider aperture such as f/1.8 or f/2.8 can help separate you from the background and can be useful indoors, but it also gives you less depth of field, which means your face can move out of focus more easily. If you are filming yourself while moving around, stopping down slightly can provide a more forgiving focus area. The A6400's autofocus system is capable of continuous tracking, but good lighting and sensible aperture choices still make a major difference to consistency.
Recommended A6400 Settings for YouTube
| Setting | Recommended Starting Point |
|---|---|
| Recording Format | XAVC S 4K |
| Resolution | 3840 x 2160 |
| Frame Rate | 25p |
| Recording Quality | 100 Mbps |
| Shutter Speed | 1/50 |
| Focus Mode | AF-C |
| Face Priority in AF | On |
| Subject Detection | Human |
| White Balance | Manual or appropriate preset |
| Picture Profile | Standard-looking profile for easy editing |
| Audio | External microphone where possible |
Best Sony A6400 Settings for Vlogging
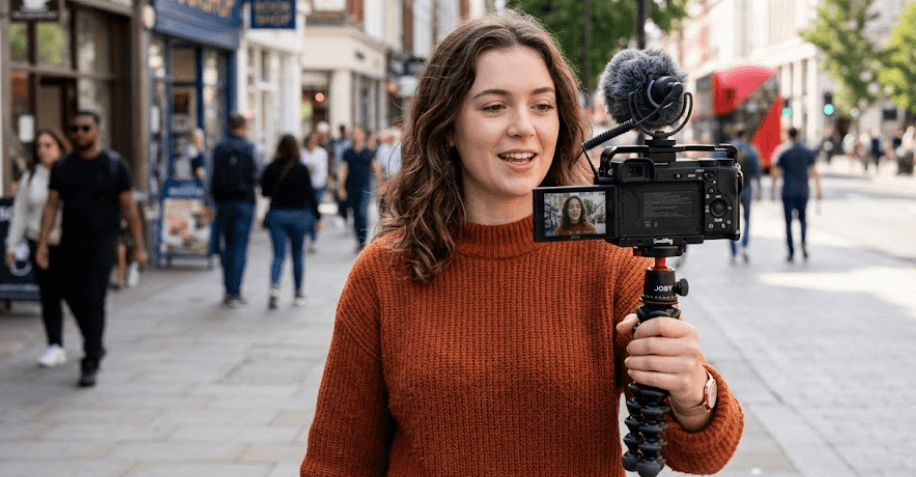
Vlogging places different demands on a camera because you may be holding it, walking with it, or changing the distance between yourself and the camera. The A6400's 180-degree tilting LCD is particularly useful here because it allows you to see your framing while recording yourself. Sony specifically highlights this screen as a useful feature for vlogging. The camera also supports an external microphone through its 3.5 mm stereo microphone input, which is important because clean audio can have a larger effect on perceived video quality than small differences in image sharpness.
For a talking vlog, AF-C is the practical focus mode because the camera needs to keep adjusting as you move. Face Priority in AF should also be enabled when you want the camera to prioritize your face rather than the background. Sony's guidance identifies AF-C as the appropriate choice for moving subjects, while Face/Eye Priority can be used to give faces or eyes priority during autofocus. However, Sony also notes that face and eye detection can struggle in situations such as very low light, strong backlighting, or when the subject's eyes are obscured.
If you are walking outdoors, exposure becomes more difficult because sunlight can change quickly as you move between open areas and shade. Keeping the shutter speed fixed at 1/50 for 25p is preferable to allowing it to fluctuate dramatically, but you may need to adjust aperture or ISO to maintain the correct exposure. An ND filter can also be useful in bright conditions because it allows you to maintain a preferred shutter speed and aperture without overexposing the image. This is particularly useful when you want a consistent cinematic look while filming during the day.
Settings for Different Vlogging Situations
| Vlogging Situation | Frame Rate | Shutter | Focus | Main Priority |
|---|---|---|---|---|
| Talking Head | 25p | 1/50 | AF-C | Consistent exposure |
| Walking Vlog | 25p | 1/50 | AF-C | Face tracking |
| Fast B-Roll | 50p | 1/100 | AF-C | Smoother movement |
| Slow Motion | 100p | 1/100 | AF-C | Capture motion |
| Indoor Vlog | 25p | 1/50 | AF-C | Low-noise exposure |
How to Set Autofocus on the Sony A6400
Autofocus is one of the most important parts of a self-shooting setup because you cannot easily correct focus while you are presenting to the camera. For most YouTube videos, AF-C is the better starting point because it allows the camera to continuously adjust focus. Face Priority in AF can then help the camera recognize and prioritize a human subject. Sony's A6400 documentation confirms that Face/Eye Priority in AF can be enabled and that Human can be selected as the subject type.
For a normal talking-head video, it is worth testing your framing before recording the full video. Stand or sit where you will actually present, check whether the camera consistently recognizes your face, and watch how it behaves when you move your hands into the frame. A large object placed between you and the camera can sometimes pull focus away from your face, so a short test recording can prevent an entire video from being ruined by inconsistent focus.
The A6400 also gives you different focus-area options, so you do not have to rely on the same setup for every type of content. A face-priority setup works well when you are the main subject, while a more controlled focus area can be useful for product demonstrations, desk setups, or B-roll where you deliberately want the camera to focus on an object. Remember that autofocus is a tool rather than a guarantee. Good lighting, sensible positioning, and enough depth of field can make the system considerably more reliable.
Autofocus Setup for Creators
For most self-recorded YouTube videos, start with AF-C, Face Priority in AF set to On, and Human selected under Subject Detection. If the camera repeatedly changes focus to objects in the foreground, try simplifying the background or adjusting the focus area rather than immediately changing every other setting. For product videos, you may prefer more deliberate focus control because the camera needs to switch attention between your face and the product.
Best ISO, Aperture, and White Balance Settings
ISO should be treated as the setting that helps you compensate when the available light is insufficient, rather than something you should keep at a single number for every video. The A6400's movie ISO range extends from ISO 100 to ISO 32000, with Auto ISO also available. In bright daylight, a lower ISO generally gives you a cleaner image, while indoor shooting may require a higher setting. The goal is to expose your subject properly without pushing ISO unnecessarily high.
Aperture controls both exposure and depth of field. If you are filming a sit-down video with a fast lens, an aperture around f/2 to f/2.8 can give you attractive background separation, but you should make sure your face remains within the usable focus area. For group videos or situations where you move significantly toward and away from the camera, a smaller aperture can provide more depth of field. There is no single aperture that is automatically the best for every Sony A6400 vlog.
White balance deserves more attention than many beginners give it. Auto White Balance can be convenient when you are moving through different lighting environments, but it can also change the colour of your footage during a shot. If you are recording a controlled talking-head video, using a fixed white-balance setting or manually setting white balance can give you more consistent colour between clips. This becomes particularly important when you are editing multiple clips together and want skin tones to match.
Exposure Starting Points
| Shooting Environment | Aperture Starting Point | ISO Approach | White Balance |
|---|---|---|---|
| Bright Outdoor Vlog | f/2.8 to f/5.6 | Low ISO | Fixed or Auto |
| Indoor Talking Head | f/1.8 to f/2.8 | Auto or moderate ISO | Fixed preferred |
| Low-Light Room | Wider aperture | Raise as needed | Fixed preferred |
| Product B-Roll | Based on depth of field | Keep as low as practical | Fixed |
| Outdoor B-Roll | Based on desired look | Low ISO | Fixed or Auto |
Picture Profile and Colour Settings for YouTube
The A6400 gives you several Picture Profile options, including standard gamma choices, Cine profiles, S-Log2, S-Log3, and HLG options. Sony lists PP1 through PP10 on the camera, with PP7 based on S-Log2 and PP8 based on S-Log3 with S-Gamut3. Cine, PP9 is based on S-Log3 with S-Gamut3, and PP10 intended for HLG2 HDR recording.
For beginners, however, S-Log should not automatically be treated as the best setting. Sony states that S-Log2 and S-Log3 are designed with post-processing in mind, and the company's help documentation warns that noise can become more noticeable in darker parts of the image. If your YouTube workflow involves recording, making basic edits, and uploading without extensive color grading, a standard or more natural-looking profile can be much easier to manage.
S-Log becomes more useful when you understand exposure and color grading and actually need the additional flexibility in post-production. It can be a good choice for controlled productions where you have enough light and a planned editing workflow, but it is not necessary for every vlog. HLG is another option on the A6400, but it is intended for HDR workflows and compatible displays. For a conventional YouTube workflow, keeping the picture profile simple is often the more practical choice.
S-Log or Standard Profile?
If your priority is fast editing and consistent-looking YouTube footage, start with a standard-looking profile. If you are comfortable with color grading and understand how to expose Log footage, S-Log2 or S-Log3 can become part of a more advanced workflow. The important point is that Picture Profile should match your editing skills and final delivery requirements rather than being selected simply because it sounds more professional.
Best Audio Settings for Sony A6400 YouTube Videos
A good video can still feel amateurish if the audio is weak, which is why the microphone setup deserves as much attention as the camera settings. The A6400 has a built-in stereo microphone, but it also provides a 3.5 mm stereo microphone input for an external microphone. Sony lists the microphone terminal as part of the camera's interface, making it possible to connect a compatible external mic directly to the camera.
For talking-head videos, an external microphone placed closer to your mouth will generally be a more useful upgrade than simply changing Picture Profile settings. A lavalier microphone can work well when you are presenting directly to camera, while a compact shotgun microphone can be useful when the camera is positioned in front of you. The important thing is to monitor your environment and keep the microphone away from clothing noise, fans, traffic, and other distracting sounds.
One limitation to remember is that the A6400 does not have a headphone terminal. Sony's specifications list a microphone input but no headphone output. That means you cannot connect headphones directly to the camera for conventional live audio monitoring. Because of that limitation, always perform a short recording test before a major shoot and listen to the recorded file. Sony also provides an Audio Rec Level function, allowing you to adjust the recording level rather than relying entirely on an uncontrolled audio level.
Common Sony A6400 Vlogging Mistakes
One common mistake is shooting every YouTube video at the highest setting without considering the final content. The A6400 can record high-quality 4K footage, but 4K 100 Mbps produces larger files than lower-bitrate recording. If you are recording long talking-head videos, interviews, or several hours of B-roll, storage requirements can grow quickly. Choosing 4K 25p at 100 Mbps makes sense when you want maximum detail from the available 4K modes, but it should still fit your editing computer, storage, and publishing workflow.
Another mistake is changing shutter speed to solve every exposure problem. If you are shooting 25p and constantly moving the shutter from 1/50 to much faster values simply because the scene is bright, motion can begin to look less natural. In bright outdoor conditions, an ND filter can be a better solution when you want to preserve your chosen shutter speed and aperture. Likewise, increasing ISO should not be the first solution when the real problem is insufficient lighting.
The final mistake is focusing entirely on camera settings while ignoring the physical setup. The A6400 has useful autofocus and a forward-facing screen, but the camera cannot compensate for poor lighting, distracting backgrounds, weak audio, or an unsuitable lens. A simple setup with good light, an appropriate lens, reliable autofocus, and clean audio can produce a much better YouTube video than a complicated setup filled with advanced settings that you do not fully understand.
Frequently Asked Questions
Q. What are the best Sony A6400 settings for YouTube?
For a typical YouTube video in India, a strong starting point is XAVC S 4K at 25p and 100 Mbps, with a shutter speed of 1/50. Use AF-C with Face Priority in AF enabled, then adjust aperture and ISO according to your lighting and lens.
Q. Should I shoot 4K 25p or 1080p 50p on the Sony A6400?
Use 4K 25p when you want maximum detail for normal YouTube videos. Full HD 50p is useful when you want smoother motion or plan to slow footage down moderately during editing. The A6400 supports both modes in its PAL recording options.
Q. What shutter speed should I use for 25fps on the A6400?
A shutter speed of 1/50 is a sensible starting point for 25p footage because it follows the commonly used double-frame-rate guideline. If you switch to 50p, 1/100 is the corresponding starting point.
Q. Should I use autofocus or manual focus for vlogging?
AF-C is generally the easier choice when you are moving or changing your distance from the camera. Face Priority in AF can help the camera prioritize your face. Manual focus can make sense for controlled shots where the camera and subject remain in fixed positions.
Q. Does the Sony A6400 have eye autofocus for video?
The A6400 supports face and eye detection functions, but Sony notes that eye detection has limitations depending on the shooting mode and conditions. In particular, eye detection is unavailable in certain high-frame-rate movie settings such as 100p/120p.
Q. Should I use S-Log3 for YouTube videos?
Not necessarily. S-Log3 is designed for footage that will be processed in post-production, so it makes more sense when you are comfortable with color grading. For straightforward YouTube production, a standard-looking Picture Profile can be easier and faster to work with.
Q. Does the Sony A6400 have a microphone input?
Yes. The A6400 has a 3.5 mm stereo microphone input, so you can connect a compatible external microphone directly to the camera.
Q. Can I monitor audio with headphones on the Sony A6400?
No. Sony's specifications list a 3.5 mm microphone terminal but no headphone terminal on the A6400. It is therefore important to test your audio before recording an important video.
Q. Is the Sony A6400 good for handheld vlogging?
It can work well for handheld vlogging, particularly because its 180-degree tilting screen helps you frame yourself. However, the camera does not have in-body image stabilization, so your lens, shooting technique, support equipment, or post-production stabilization can affect how steady handheld footage looks.
Q. What Picture Profile should beginners use on the Sony A6400?
Beginners who want an easy YouTube workflow should generally start with a standard-looking profile rather than immediately using S-Log2 or S-Log3. Log profiles are more useful when you understand exposure and plan to color grade the footage. Sony specifically describes S-Log footage as being intended for processing after shooting.
Final Recommendation
The best Sony A6400 settings for vlogging and YouTube are not about turning every option to its most advanced setting. For most creators in India, a dependable setup is 4K 25p at 100 Mbps, 1/50 shutter speed, AF-C, Face Priority in AF, a sensible aperture for the lens and lighting, and a fixed white balance when shooting in controlled conditions. This gives you a strong starting point without making the workflow unnecessarily complicated.
For handheld vlogging, make use of the A6400's 180-degree screen and consider an external microphone through the 3.5 mm input. If you are shooting outdoors in bright light, an ND filter can help you maintain your preferred exposure settings. For slow-motion B-roll, switch to Full HD 100p in the PAL configuration, keeping in mind that some autofocus functions have limitations at high frame rates.
Most importantly, do not choose S-Log simply because it sounds more professional. If you want footage that is quick to edit and publish, a standard-looking profile is often the better choice. The A6400 has enough video flexibility to grow with you, so start with a simple setup, learn how exposure and autofocus behave, and then introduce more advanced settings as your YouTube workflow develops.