Best Nikon D7500 Settings for Low-Light Photography
Learn the best Nikon D7500 settings for low-light photography, from ISO and shutter speed to aperture and autofocus. Get practical settings for portraits, streets, events, and night scenes.

TL;DR The best Nikon D7500 settings for low-light photography depend on whether your subject is moving or staying still, but a good starting point is Manual or Aperture Priority mode, a wide aperture, shutter speed fast enough to prevent camera shake, and Auto ISO or a controlled ISO range. For handheld portraits and street photography, try around f/1.8 to f/2.8, 1/125 to 1/250 sec, and ISO 800 to 3200, adjusting according to the available light. For static night scenes, use a tripod, a low ISO such as 100 to 400, and a slower shutter speed. The D7500's 20.9MP DX sensor, EXPEED 5 processor, and standard ISO range of 100 to 51,200 give it useful low-light flexibility, but the lens, shutter speed, focusing technique, and exposure choice still have a major effect on the final image.
Why Low-Light Settings Matter on the Nikon D7500
Low-light photography is less about finding one perfect setting and more about balancing three exposure controls: aperture, shutter speed, and ISO. The Nikon D7500 can handle high ISO settings, but increasing ISO does not create more light. It makes the sensor more sensitive to the available light while also increasing the possibility of visible noise. That is why the first step should usually be to decide how much light your lens can provide and how fast your shutter needs to be. Nikon's own guidance explains that a wider aperture lets more light reach the sensor, while increasing ISO can allow you to use a faster shutter speed when the scene is dim.
The D7500 is well suited to this kind of adjustment because it has a 20.9MP DX-format CMOS sensor and EXPEED 5 image processor. Nikon gives the camera a standard ISO range of 100 to 51,200, with expanded settings available beyond that range. However, the fact that the camera can reach extremely high ISO values does not mean you should automatically use them. Very high ISO settings can introduce more visible noise and reduce fine detail, so it is generally better to use the lowest ISO that still allows you to achieve the shutter speed and aperture you actually need.
The lens also becomes extremely important once the light starts falling. A lens with a maximum aperture of f/1.8 or f/2.8 can gather considerably more light than a slower kit zoom at its longer focal lengths. This can let you maintain a faster shutter speed without pushing ISO as high. If your D7500 is paired with a variable-aperture zoom, you may need to accept a higher ISO in darker scenes. That is not necessarily a problem, because a slightly noisy but sharp photograph is usually more useful than a cleaner photograph ruined by subject movement or camera shake.
A Practical Starting Point
For a handheld low-light portrait, a useful starting point is around f/2.0 to f/2.8, 1/125 sec, and ISO 800 to 1600. If the subject is moving, increasing the shutter speed to 1/250 sec may be more important than keeping ISO low. For a stationary subject, you can use a slower shutter speed if your technique and lens allow it. These are starting points rather than fixed rules because the correct exposure changes with the scene, lens, focal length, and subject movement.
| Shooting Situation | Aperture | Shutter Speed | Starting ISO |
|---|---|---|---|
| Low-light portrait | f/1.8–f/2.8 | 1/125–1/250 sec | 800–3200 |
| Indoor event | f/2–f/2.8 | 1/125–1/250 sec | 800–3200 |
| Night street photography | f/1.8–f/2.8 | 1/100–1/250 sec | 800–3200 |
| Static night scene | f/4–f/8 | 1–10 sec | 100–400 |
| Stars and night sky | Wide open | Several seconds | 1600–6400+ |
These values are practical starting ranges rather than Nikon-prescribed settings. The correct combination should always be checked against the exposure meter, histogram, subject movement, and the result on the camera's playback screen.
Best ISO Settings for Nikon D7500 Low-Light Photography
ISO is often the setting photographers reach for first when a scene becomes dark, but it should usually be treated as part of a larger exposure decision. The Nikon D7500 has a standard ISO range from 100 to 51,200, which gives you considerable flexibility for dim environments. Nikon also lists expanded ISO settings beyond the standard range, but those extreme settings are better viewed as emergency options rather than everyday choices when image quality is important.
For general handheld low-light photography, ISO 800 to 1600 is a sensible place to begin. If the room or street is particularly dark, ISO 3200 can still be useful when getting a sharp image matters more than keeping noise extremely low. ISO 6400 and above can help when you have no other way to maintain an appropriate shutter speed, particularly for events, performances, or wildlife. The important point is not to treat ISO 1600 or ISO 3200 as a hard quality limit. The acceptable amount of noise depends on exposure, subject, lens, output size, and your own tolerance.
Auto ISO can also be useful on the D7500 when light levels change quickly. Nikon explains that Auto ISO can automatically adjust sensitivity while the photographer controls aperture and shutter speed in Manual exposure mode. That can be particularly useful for handheld street photography or events where you want to maintain a particular shutter speed while allowing the camera to compensate as people move between brighter and darker areas.
When To Raise ISO
The most important reason to increase ISO in low light is usually to protect shutter speed. If your subject is moving and your shutter speed has fallen too low, reducing ISO may produce a technically cleaner image but a blurry photograph. Raising ISO can be the better decision because it allows you to capture the moment sharply.
| ISO | Best Use | General Expectation |
|---|---|---|
| 100–400 | Tripod night scenes | Lowest noise |
| 800–1600 | Indoor and street photography | Strong starting range |
| 3200 | Dark interiors and events | Useful balance |
| 6400 | Very dark handheld scenes | More visible noise |
| 12800+ | Extremely dark situations | Use when capturing the image matters most |
Best Aperture and Shutter Speed Settings
Aperture controls how much light enters through the lens, so a wider aperture is often one of the easiest ways to improve low-light performance. If your lens opens to f/1.8, f/2, or f/2.8, those settings can be valuable in dark environments because they allow more light to reach the sensor. The trade-off is that a wider aperture produces a shallower depth of field, so you need to pay closer attention to focusing, especially for portraits where the subject's eyes need to be sharp.
Shutter speed becomes equally important when your subject is moving. A shutter speed of 1/30 sec might work for a stationary subject with good technique, but it is risky for a person walking toward you. For handheld people photography, 1/125 sec is a useful starting point, while 1/250 sec or faster can be preferable when the subject is moving. Sports, dancing, or fast action may require considerably faster shutter speeds, which usually means accepting a higher ISO. Nikon similarly notes that increasing ISO can enable faster shutter speeds in low-light situations.
For static subjects, the approach changes completely. If the camera is mounted securely on a tripod, you can use a much slower shutter speed and keep ISO low. This is ideal for architecture, cityscapes, light trails, and other scenes where nothing important in the frame needs to move. A tripod lets you collect more light without relying on a high ISO, which can produce a cleaner file.
Recommended Exposure Starting Points
| Subject | Aperture | Shutter Speed | ISO |
|---|---|---|---|
| Portrait | f/1.8–f/2.8 | 1/125 sec | 800–1600 |
| Walking subject | f/2–f/2.8 | 1/250 sec | 1600–3200 |
| Indoor event | f/2–f/2.8 | 1/125–1/250 sec | 1600–3200 |
| Cityscape on tripod | f/5.6–f/8 | 1–5 sec | 100–400 |
| Light trails | f/8–f/11 | Several seconds | 100–400 |
Autofocus Settings for Low-Light Photography
Autofocus can become more difficult as the scene gets darker because the camera has less contrast to work with. The D7500 uses a 51-point autofocus system, and Nikon describes the camera as offering strong autofocus and low-light performance. In practical use, however, no autofocus system can reliably focus on a subject that has almost no visible detail. Giving the autofocus system a clear edge, eye area, face, or other contrast point can make focusing more reliable.
For stationary subjects, AF-S is generally the sensible starting point because the camera focuses once and holds that focus when you half-press the shutter. For moving subjects, AF-C is more appropriate because the camera can continuously adjust focus as the subject changes distance. Choosing a single-point or otherwise controlled focus-area option can also make it easier to tell the camera exactly where you want it to focus instead of allowing it to choose an unintended bright object in the background.
If autofocus struggles in extremely dark conditions, switch to a brighter area of the subject or use a practical focusing aid before recomposing. Manual focus can also be useful for static night scenes, particularly when the camera is mounted on a tripod. For stars or distant night scenes, focusing carefully rather than repeatedly asking autofocus to lock in near darkness can save time and produce more consistent results.
Focus Settings To Start With
| Scenario | Focus Mode | Practical Approach |
|---|---|---|
| Static portrait | AF-S | Single controlled focus point |
| Moving person | AF-C | Track the subject |
| Indoor event | AF-C | Use a suitable focus-area mode |
| Tripod landscape | AF-S or Manual | Focus carefully before shooting |
| Very dark static scene | Manual | Use magnified live view to confirm focus |
Best Nikon D7500 Settings for Night Photography
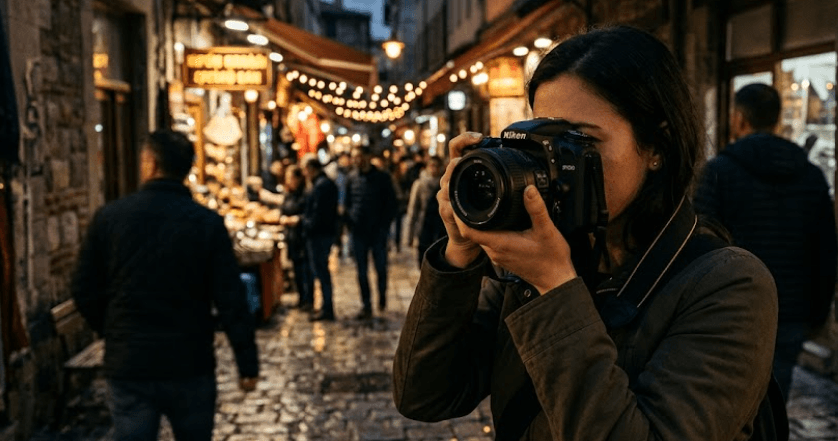
Night photography becomes much easier when you separate handheld shooting from tripod shooting. If you are walking through a city and photographing people, cars, signs, or street scenes, you need to keep the shutter fast enough to control movement. In that situation, a wide aperture and higher ISO are usually more useful than a very slow shutter. The goal is not to eliminate noise at all costs. The goal is to produce a sharp photograph with enough detail to remain useful.
Tripod-based night photography is different because the camera is no longer responsible for compensating for your hand movement. You can keep ISO close to the base setting and allow the shutter to remain open for several seconds. Apertures around f/5.6 to f/8 can work well for cityscapes when you want good depth of field, although the exact choice depends on the scene and lens. A sturdy tripod and careful composition matter more here than simply pushing the camera to its highest ISO setting.
For long exposures, use a remote release or the camera's self-timer where practical to reduce the chance of movement when pressing the shutter button. You should also consider whether any moving subject in the scene is desirable. A stationary building can remain sharp during a long exposure, while people or cars may turn into motion blur. That is not necessarily a problem, but it should be an intentional part of the photograph.
Night Photography Starting Settings
| Night Scene | Mode | Aperture | ISO | Shutter |
|---|---|---|---|---|
| Handheld street | A/M | f/1.8–f/2.8 | 800–3200 | 1/100–1/250 sec |
| Cityscape tripod | M | f/5.6–f/8 | 100–400 | 1–10 sec |
| Light trails | M | f/8–f/11 | 100–400 | Several sec |
| Night portrait | M/A | f/1.8–f/2.8 | 800–3200 | 1/125–1/250 sec |
| Night sky | M | Wide open | 1600–6400+ | Several sec |
Common Mistakes When Shooting in Low Light
One of the biggest mistakes is trying to keep ISO extremely low while allowing the shutter speed to become too slow. A photograph with ISO 400 may look impressive on paper, but if a person moves during a 1/20-second exposure, the final image may be unusable. Raising ISO to 1600 or 3200 can be the better choice if it allows you to reach a shutter speed that freezes the subject.
Another common mistake is assuming that the highest ISO setting on the camera represents its best low-light capability. The D7500's expanded ISO range reaches far beyond its standard ISO 100 to 51,200 range, but extreme sensitivity settings involve image-quality compromises. Nikon's specifications clearly distinguish the standard range from the expanded settings, so photographers should not treat the maximum expanded value as an everyday recommendation.
It is also easy to blame the camera when the real limitation is the lens. A slow zoom lens may force you to increase ISO much more than a fast prime would in exactly the same scene. Similarly, image stabilization can help with camera movement in some situations, but it cannot freeze a moving person. Understanding the difference between camera shake and subject movement is therefore essential when choosing your low-light settings.
Frequently Asked Questions
Q. What is the best ISO for low-light photography on the Nikon D7500?
ISO 800 to 1600 is a useful starting range for many handheld low-light situations. ISO 3200 or higher can be appropriate when you need a faster shutter speed, especially for moving subjects. The D7500 has a standard ISO range of 100 to 51,200, with expanded settings beyond that range.
Q. What shutter speed should I use for low-light portraits?
Start around 1/125 sec for a relatively still person and increase toward 1/250 sec if the subject is moving. The correct shutter speed depends on movement, focal length, and your shooting technique.
Q. What aperture is best for Nikon D7500 night photography?
A wide aperture such as f/1.8, f/2, or f/2.8 is useful for handheld night photography because it allows more light into the camera. For tripod-based landscapes, narrower apertures such as f/5.6 to f/8 can provide greater depth of field.
Q. Is the Nikon D7500 good for low-light photography?
Yes. Its 20.9MP DX sensor, EXPEED 5 processor, and standard ISO range up to 51,200 give it useful low-light capability. Nikon specifically highlights its high-ISO performance and low-light capabilities.
Q. Should I use Auto ISO on the Nikon D7500 at night?
Auto ISO can be useful when lighting changes and you want to maintain a particular aperture and shutter speed. Nikon confirms that Auto ISO can adjust sensitivity automatically in Manual exposure mode while the photographer fixes aperture and shutter speed.
Q. What autofocus mode should I use for moving subjects in low light?
AF-C is generally the better starting point for moving subjects because it continuously adjusts focus as the subject changes distance. AF-S is more suitable for stationary subjects.
Q. Should I use a tripod for night photography?
A tripod is highly useful for static night scenes because it lets you use slower shutter speeds and lower ISO values. It is particularly valuable for cityscapes, architecture, light trails, and other stationary subjects.
Q. What ISO should I use for night photography on a tripod?
Start around ISO 100 to 400 for a static scene. Because the tripod prevents camera movement, you can use a slower shutter speed to collect more light instead of increasing ISO unnecessarily.
Q. Why are my Nikon D7500 night photos blurry even at a low ISO?
The shutter speed may be too slow for the subject or your hand movement. Increasing ISO can allow you to use a faster shutter speed. A clean but blurry photograph is generally less useful than a slightly noisy photograph that is sharp.
Q. Does the lens matter for low-light photography on the D7500?
Yes. A lens with a wider maximum aperture, such as f/1.8 or f/2.8, can let more light reach the sensor than a slower lens. This can reduce the ISO required or allow a faster shutter speed in the same lighting.
Final Recommendation
The best Nikon D7500 settings for low-light photography are not a single combination that works for every scene. For handheld portraits, street photography, and indoor events, start with a wide aperture around f/1.8 to f/2.8, a shutter speed around 1/125 to 1/250 sec, and ISO 800 to 3200, then adjust based on subject movement and available light. For static night scenes, a tripod changes the equation completely, allowing you to use ISO 100 to 400 and a much slower shutter speed while keeping the image clean.
The D7500 remains a capable low-light DSLR because its 20.9MP DX sensor, EXPEED 5 processor, high standard ISO range, and 51-point autofocus system give photographers plenty of control. The biggest improvement will often come from using the right lens and choosing shutter speed based on the subject rather than simply forcing ISO as low as possible. If the subject moves, protect shutter speed. If the scene is static, use a tripod and keep ISO low. That simple approach will help you get consistently sharper and better-exposed low-light photographs from the Nikon D7500.